Ah, the allure of red velvet! It’s a flavor that dances on the tongue, rich with cocoa and yet uniquely light, cloaked in its signature vivid red hue. This taste sensation, when melded into the dense, moist form of a brownie, creates a dessert that’s both a feast for the eyes and a delight for the palate. In this article, we’re diving deep into the heart of red velvet brownies, exploring their origins, the magic behind their ingredients, and, of course, guiding you step-by-step through crafting your very own batch. From the essential components that give these brownies their iconic flavor and color to the final touches that make them truly irresistible, we’ve got you covered.
So, buckle up, dear reader, for a culinary journey that promises to enrich your baking repertoire and impress at your next gathering. Whether you’re a seasoned baker or new to the kitchen, these insights and tips will elevate your red velvet brownies from delightful to divine.
The Unique Charm of Red Velvet Brownies
What exactly sets red velvet brownies apart in the vast world of desserts? Is it the vibrant red color that catches the eye or the delicate balance of flavors that ensnares the palate? In truth, it’s a combination of both, plus the brownie’s rich history and its evolution into the beloved treat we know today.
Red velvet’s origins are somewhat of a mystery, with tales of its creation ranging from the accident of a curious chef to the marketing strategy of a food coloring company. Regardless, this dessert has carved its niche in the culinary world, standing out not just for its appearance but for its taste as well.
The main allure of red velvet lies in its flavor profile. Unlike traditional chocolate brownies, red velvet offers a subtle cocoa taste, enhanced by a slight acidity from vinegar and buttermilk. This unique combination creates a taste that’s rich yet balanced, capable of satisfying both chocolate lovers and those who prefer a less intense cocoa flavor.
What Makes Red Velvet Brownies Special?
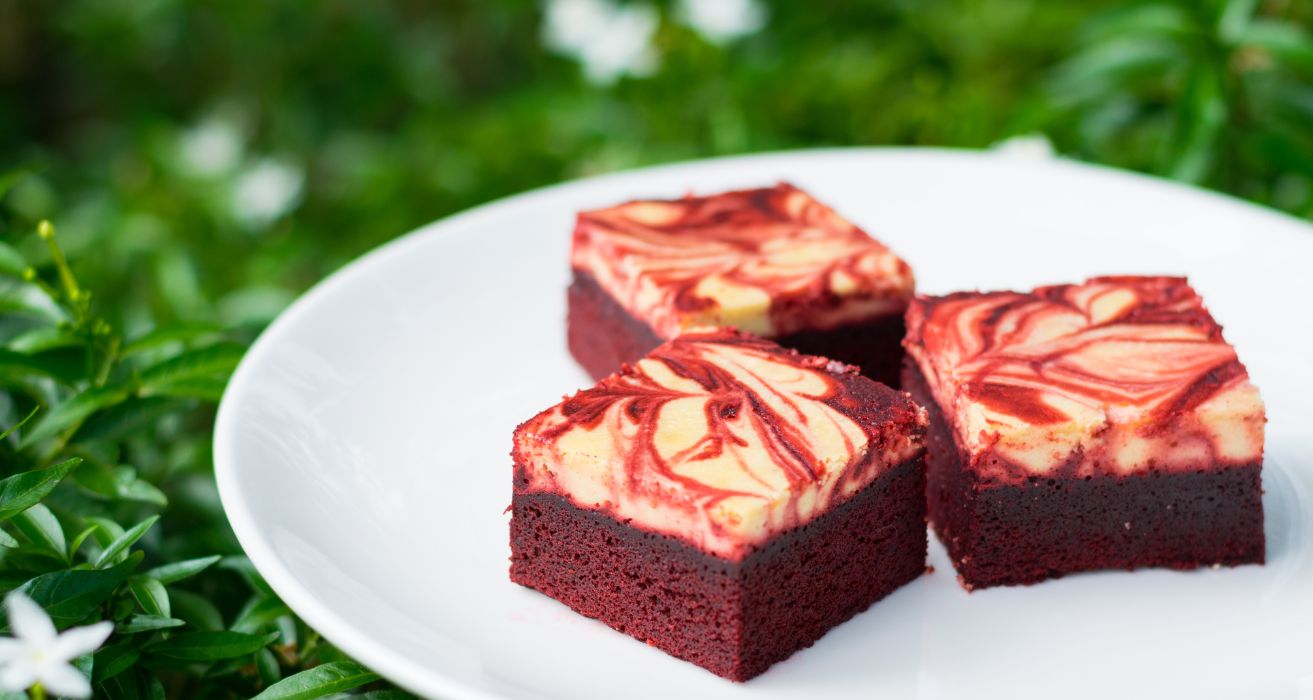
At their core, red velvet brownies share many similarities with their cake counterpart, including key ingredients like cocoa powder and red food coloring. However, it’s the texture and form that set these brownies apart. They strike a delightful balance between the dense, fudgy nature of a classic brownie and the soft, moist crumb of a red velvet cake.
This harmonious blend results in a dessert that’s not only a joy to eat but also versatile, serving as the perfect base for a variety of toppings and mix-ins. From cream cheese swirls to chocolate chips, the options for customizing your red velvet brownies are endless.
The History and Origin of Red Velvet
The story of red velvet is as rich and complex as the dessert itself. While it’s widely believed that red velvet made its official debut in the early 20th century, the exact origins are cloaked in mystery. Some claim it originated in the South, while others argue it was the brainchild of a New York City eatery.
One thing is for certain: red velvet’s rise to fame was bolstered by the advent of food coloring, allowing bakers to enhance its natural reddish hue to the vibrant color we recognize today. This, coupled with its distinctive taste, has cemented red velvet’s place in the heart of dessert lovers across the globe.
As we embark on this exploration of red velvet brownies, we’re not just baking a treat; we’re paying homage to a piece of culinary history. So, let’s don our aprons, preheat our ovens, and dive into the world of red velvet, where every bite tells a story.
Stay tuned as we venture into the next segment, where we’ll unveil the secret ingredients that make red velvet brownies truly stand out. It’s here that we’ll begin to piece together the puzzle, ingredient by ingredient, to reveal the masterpiece that is the red velvet brownie.
The Basic Ingredients
Essential Ingredients for Perfect Red Velvet Brownies
Embarking on the journey to bake the perfect red velvet brownies begins with gathering the right ingredients. Each component plays a crucial role, contributing to the final taste, texture, and appearance of these delightful treats. Here’s what you’ll need:
- Butter: The backbone of richness, adding moisture and flavor.
- Sugar: Sweetness is key, and sugar balances the cocoa’s bitterness.
- Eggs: They bind the ingredients together, ensuring a chewy texture.
- Vanilla Extract: A dash of vanilla enhances the overall flavor profile.
- Red Food Coloring: The hallmark of red velvet, this gives the brownies their signature hue. For those concerned about artificial colors, explore natural alternatives like beet juice.
- Cocoa Powder: Opt for a high-quality cocoa powder for that subtle but essential chocolatey note.
- All-purpose Flour: The foundation of the brownie’s structure, keeping them dense yet soft.
- Salt: A pinch to balance the sweetness.
- Vinegar: A traditional red velvet ingredient, adding a touch of acidity to brighten the flavors.
- Buttermilk: For moisture and a tender crumb, buttermilk is a red velvet staple.
With your ingredients lined up, you’re halfway to creating a batch of brownies that will mesmerize and delight. Remember, quality matters, so choose your ingredients wisely for the best results.
The Role of Cocoa in Red Velvet
Cocoa powder not only contributes to the flavor but also to the chemistry of red velvet brownies. Unlike its more indulgent cousin, the chocolate brownie, red velvet focuses on a more subtle cocoa presence, allowing the buttermilk and vinegar’s tangy notes to shine through. This delicate balance is what gives red velvet its distinctive taste, setting it apart from other desserts.
When selecting cocoa powder, opt for an unsweetened variety that offers depth without overpowering sweetness. This will ensure that your brownies have the perfect chocolate hint, enhancing the overall flavor complexity.
Choosing the Right Type of Red Food Coloring
The vibrant red of these brownies isn’t just for show; it’s a signature element that defines the dessert. While traditional recipes often call for liquid food coloring, there’s room for personal preference and dietary considerations. If you’re keen on using a natural alternative, red beet powder or concentrated beet juice can provide a beautiful color and a slight health boost, though the final shade may be more subdued compared to synthetic dyes.
For those sticking with traditional food coloring, a water-based liquid dye will integrate seamlessly into your batter, ensuring that every brownie is as visually stunning as it is delicious. However, remember that moderation is key. Too much can affect the taste and texture of your brownies.
Armed with these foundational ingredients and a deeper understanding of the role each plays in the creation of red velvet brownies, you’re well on your way to baking success. Next, we’ll tackle the mixing and baking process, where the magic truly begins to unfold. Stay tuned as we delve into the step-by-step guide to making the most indulgent, mouth-watering red velvet brownies you’ve ever tasted.
The Recipe Process
Step-by-Step Guide to Making Red Velvet Brownies
Creating the ultimate red velvet brownies involves more than just mixing ingredients together. It’s about understanding the sequence and technique to ensure a perfect outcome every time. Let’s walk through the process step by step.
Ingredients:
- 1/2 cup (1 stick) unsalted butter
- 1 cup granulated sugar
- 2 large eggs
- 1 teaspoon vanilla extract
- 1 1/2 teaspoons red food coloring (or natural alternative)
- 1 1/4 cups all-purpose flour
- 2 tablespoons unsweetened cocoa powder
- 1/4 teaspoon salt
- 1/3 cup buttermilk
- 1/2 teaspoon white vinegar
Directions:
- Preheat and Prepare: Start by preheating your oven to 350°F (175°C). Line an 8-inch square baking pan with parchment paper, leaving an overhang on the sides for easy removal.
- Melt Butter: In a medium saucepan over low heat, melt the butter. Remove from heat and let cool slightly.
- Mix Wet Ingredients: To the cooled butter, whisk in the sugar, eggs, vanilla extract, and red food coloring until smooth and well combined.
- Combine Dry Ingredients: In a separate bowl, sift together the flour, cocoa powder, and salt.
- Alternate Dry and Buttermilk: Gradually add the dry ingredients to the wet mixture, alternating with the buttermilk, starting and ending with the dry ingredients. Stir just until combined; do not overmix.
- Add Vinegar: Stir in the vinegar, mixing until just combined.
- Bake: Pour the batter into the prepared pan, smoothing the top with a spatula. Bake for 25-30 minutes, or until a toothpick inserted into the center comes out with a few moist crumbs attached.
- Cool: Allow the brownies to cool in the pan on a wire rack before lifting out by the parchment paper overhang.
- Serve: Cut into squares and serve. For an extra touch, consider dusting with powdered sugar or topping with a dollop of cream cheese frosting.
Preparing Your Baking Tools and Ingredients
Before diving in, it’s essential to have all your tools and ingredients ready. This “mise en place” ensures a smooth baking process, minimizing errors and omissions. Gather your measuring cups, spoons, mixing bowls, and baking pan. Measure out each ingredient, so they’re ready to go when the recipe calls for them.
Mixing the Batter: Tips and Techniques
When mixing your batter, the goal is to incorporate the ingredients thoroughly while avoiding overmixing. Overworked batter can lead to tough, dense brownies. Use a gentle folding motion when adding the dry ingredients to the wet, and stop as soon as everything is just combined. This ensures a tender, moist texture in your final product.
Baking Time and Temperature Guidelines
Oven temperatures can vary, so it’s important to know your oven. Start checking your brownies a few minutes before the recipe’s suggested baking time. Remember, the perfect brownie is slightly underbaked, yielding that characteristic moist, fudgy center.
With these detailed instructions, you’re well-equipped to create a batch of red velvet brownies that will delight and impress. As you wait for the brownies to bake, consider exploring other variations and twists to add your own personal touch to this classic dessert. Next, we’ll explore creative ways to elevate your red velvet brownies, from swirls of cream cheese to incorporating unexpected ingredients for a truly unique treat. Stay tuned!
Variations and Modifications
Creative Twists on the Classic Red Velvet Brownie Recipe
Once you’ve mastered the basic red velvet brownie, why not shake things up a bit? Introducing variations and modifications can transform this classic treat into something uniquely yours. Let’s dive into a couple of delectable ideas that are sure to tantalize the taste buds.
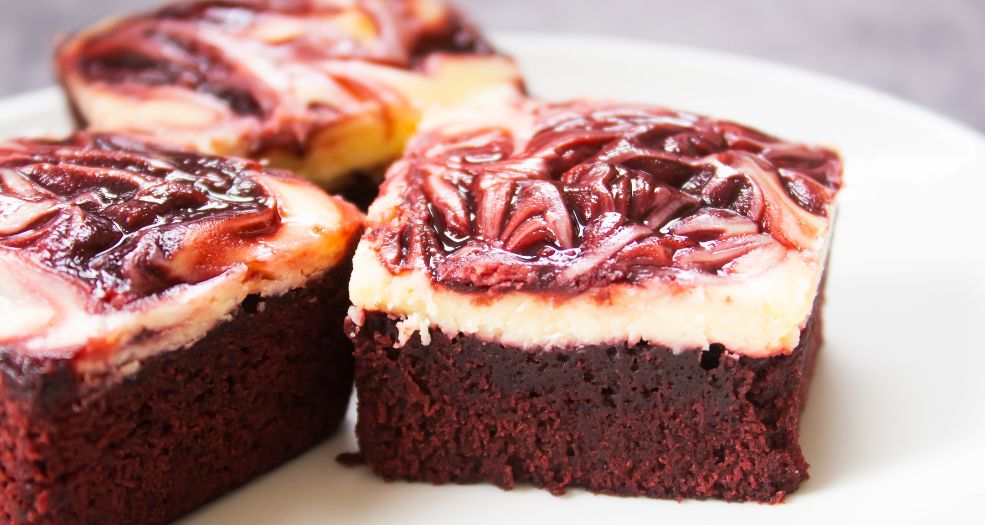
Adding Cream Cheese Swirls
A cream cheese swirl not only adds a visually stunning marble effect but also introduces a delightful tanginess that complements the sweet and cocoa-infused base. Here’s how to incorporate it:
Ingredients:
- 8 ounces cream cheese, softened
- 1/4 cup granulated sugar
- 1 egg
- 1/2 teaspoon vanilla extract
Directions:
- In a mixing bowl, beat the cream cheese and sugar until smooth.
- Add the egg and vanilla extract, mixing until well combined.
- Dollop the cream cheese mixture over your red velvet brownie batter in the pan.
- Use a knife or skewer to swirl the cream cheese into the batter, creating a marbled effect.
- Bake as directed, noting that you may need to add a few extra minutes to the baking time.
This simple addition elevates the humble brownie into a dessert that’s as fitting for a casual get-together as it is for an elegant dinner party.
Gluten-Free and Vegan Options
Accommodating dietary restrictions doesn’t mean compromising on flavor. For a gluten-free version, substitute all-purpose flour with a gluten-free flour blend (one that includes xanthan gum works best for texture). For vegan red velvet brownies, make the following swaps:
- Use plant-based butter and buttermilk alternatives.
- Replace eggs with flaxseed or chia seed eggs (1 tablespoon ground flaxseed or chia seeds mixed with 3 tablespoons water, set aside for 15 minutes, equals one egg).
- Ensure your red food coloring is vegan-friendly, as some traditional dyes are not.
These modifications ensure everyone can enjoy the rich, distinctive flavor of red velvet brownies, regardless of dietary preferences.
Serving and Presentation
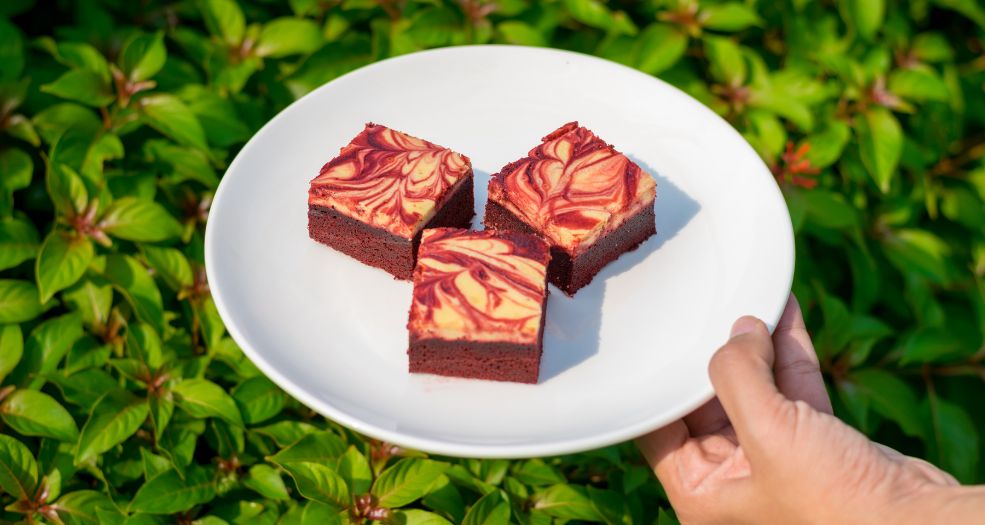
How to Serve and Present Your Red Velvet Brownies
After you’ve baked your batch of red velvet brownies, the final step before indulging is serving and presentation. This part of the process is where you can get creative and really make these treats shine, whether it’s for a casual family dessert or a more formal gathering. Let’s dive into some tips on cutting, plating, and pairing your brownies to impress.
Cutting and Plating Techniques
Achieving those clean, sharp edges on your brownies not only makes them more appealing but also showcases the beautiful contrast between the red velvet and the cream cheese swirls. Here’s how to get those perfect squares:
- Cool Completely: Patience is key. Ensure your brownies are completely cooled before attempting to cut. This could mean waiting a few hours or even chilling them in the refrigerator.
- Use the Right Knife: A sharp chef’s knife or a serrated bread knife works best. Heat the blade under hot water and wipe it dry before each cut. This heat helps the knife glide through the brownies smoothly.
- Make Precise Cuts: If you’re aiming for uniform squares, use a ruler to mark out each portion before cutting. This ensures each piece is equally sized.
For plating, consider a simple dusting of powdered sugar or a drizzle of chocolate sauce to add a touch of elegance. Placing each brownie on a small, decorative plate with a dollop of whipped cream or a fresh berry garnish can elevate the overall presentation.
Pairing with Beverages and Toppings
Red velvet brownies are versatile in terms of pairing. Here are a few suggestions to enhance the tasting experience:
- Beverages: A glass of cold milk is a classic choice, but for something more sophisticated, consider a cup of strong coffee or a dessert wine. The bitterness of coffee or the sweetness of the wine complements the rich flavors of the brownies.
- Toppings: While delicious on their own, red velvet brownies can be taken to the next level with the right toppings. A scoop of vanilla ice cream, a drizzle of caramel sauce, or a sprinkling of chopped nuts can add texture and contrast.
By thoughtfully serving and presenting your red velvet brownies, you turn a simple treat into an unforgettable dessert experience. Whether you’re sharing them with family or friends, these little touches show your care and attention to detail, making each bite that much more special.
In the next section, we’ll explore frequently asked questions about red velvet brownies, addressing common queries and concerns to ensure your baking experience is as smooth and enjoyable as possible. Stay tuned for valuable insights that will help you perfect your red velvet brownie game.
FAQs
Whether you’re a seasoned baker or new to the kitchen, questions often arise when trying a new recipe, especially one as beloved and specific as red velvet brownies. Below, we tackle some of the most common queries to help ensure your baking experience is a breeze.
What are red velvet brownies made of?
Red velvet brownies consist of butter, sugar, eggs, vanilla extract, cocoa powder, flour, salt, buttermilk, vinegar, and red food coloring. Together, these ingredients create a moist, vibrant treat that blends the best of red velvet cake and brownies.
What makes brownies fudgy or cakey?
The texture of brownies hinges on the fat-to-flour ratio. Fudgy brownies have more fat, coming from butter and chocolate. Cakey brownies contain more flour and often include baking powder for lift. Adjusting these elements can sway your brownies between fudgy and cakey.
Why are my brownies more cakey?
Brownies turn out cakey when there’s an increased amount of flour and the presence of baking powder. To achieve a fudgier texture, reduce the flour and skip the baking powder. Also, incorporating more fat, like butter or chocolate, helps create a denser, fudgier brownie.
Can red velvet brownies be made in advance?
Absolutely, and here’s the kicker: they might even taste better the next day! Making your brownies a day ahead allows the flavors to meld together beautifully. Just ensure they’re stored properly in an airtight container at room temperature. If you need to keep them for longer, they can be refrigerated for up to a week or frozen for a month. Just be sure to bring them back to room temperature before serving for the best texture.
How do you store red velvet brownies to keep them fresh?
To keep your brownies fresh and moist, store them in an airtight container. If you’ve cut them, placing a piece of parchment paper between layers helps prevent them from sticking together. At room temperature, they’ll last for several days. For longer storage, pop them in the fridge or freeze them. Remember, if refrigerated or frozen, let them come to room temperature before serving to ensure the best flavor and texture.
Are there any tricks to getting the perfect red velvet color?
The key to that signature red velvet hue lies in the type of food coloring used. Liquid food coloring is the traditional choice and provides a bright, vibrant red. For a more natural approach, beet powder or juice can be used, though the color might be more subdued. Whichever you choose, adding the coloring gradually and mixing thoroughly ensures an even, striking color throughout your brownies.
Don’t forget, red velvet brownies are just the beginning. If you’re looking to expand your baking repertoire, consider exploring other dessert recipes that can complement your newly mastered treat. For example, Slutty Brownies offer a decadent layered experience that could inspire variations on your red velvet creations. Additionally, learning how to make the perfect Cake Mix and Cool Whip Cookies can provide insights into using cake mix in innovative ways, much like you might with red velvet brownie recipes.
Wrapping Up
As we wrap up this comprehensive guide to making, serving, and enjoying red velvet brownies, we hope you feel inspired and equipped to tackle this delightful baking project. With their rich history, vibrant color, and irresistible taste, red velvet brownies are sure to be a hit on any occasion.
Remember, baking is not just about following a recipe to the letter; it’s about infusing your creations with love, creativity, and a bit of personal flair. Whether you stick to the classic recipe or venture into variations and modifications, the most important ingredient is always your enthusiasm.
Happy baking, and may your red velvet brownies bring smiles and sweetness to your table.