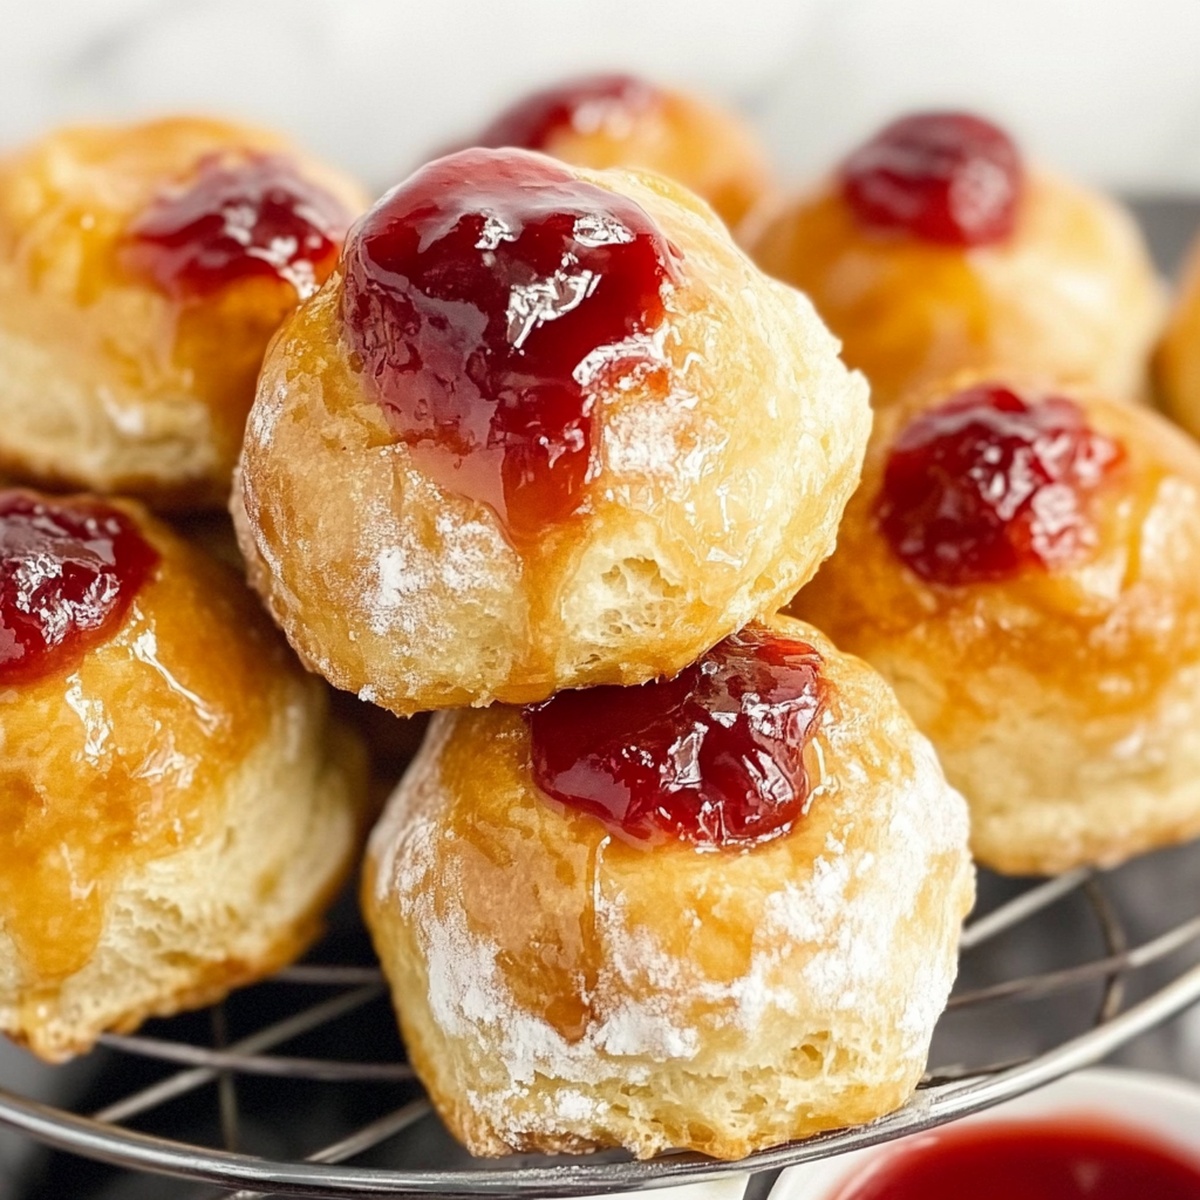
There are days when you want a dessert that feels special but doesn’t take over your whole evening. That’s exactly where these Cherry Pie Bombs fit in. They’re quick, they look impressive on a plate, and they taste like something you’d find at a fair or a tiny roadside diner after a long drive. You get that warm, classic cherry pie flavor without messing with crusts, blind-baking, or a sink full of dishes.
They’re especially good when you’ve got people dropping by and need a dessert that can sit on the counter and still taste great at room temperature. You can fry them ahead, glaze them, and just pile them onto a big platter. People naturally grab one, then come back for “just one more.” They also work surprisingly well for a date night in—split a few warm ones with coffee or a nightcap and call it dessert done.
What I like most is how flexible they are. Use the base idea—biscuit dough, fruit filling, quick glaze—and you can easily tweak it to match whatever you have on hand or what’s in season. But starting with this cherry version is smart: it’s nostalgic, familiar, and crowd-friendly. If you’re looking for a low-stress dessert that still feels like you made an effort, these Cherry Pie Bombs are worth your time.
Letting the Ingredients Shine: Cherry Pie Bombs
Things to Grab
- Vegetable oil, for frying
- 1 (16.3-ounce) can Grands “Big” flaky biscuits
- 1 (21-ounce) can cherry pie filling
- 2 cups powdered sugar
- 1/4 cup milk
- 1 tablespoon light corn syrup
The Process
- Pour vegetable oil into a 2 to 3-quart heavy-bottomed saucepan until it’s a little over halfway full. You want enough depth to fully submerge each dough ball. Set the pot aside while you prep the biscuits.
- Open the biscuit can and gently split each biscuit in half by separating the flaky layers across the center. Use your fingers or a rolling pin to flatten each piece into a round. Don’t make them too thin—you just want a slightly larger circle to hold the filling.
- Place about 1 tablespoon of cherry pie filling right in the center of each flattened biscuit round. Avoid overfilling so the seams can close properly.
- Bring the dough up around the filling and pinch the edges firmly together, making sure there are no gaps. Then tuck the seams under and gently roll it into a smooth ball shape. Repeat with all pieces.
- Set the pot of oil over medium heat and warm it to 325°F. Use a thermometer and aim to hold that temperature steady while frying.
- Carefully lower 2–3 dough balls into the hot oil using a slotted metal spoon. Gently turn them as they cook so they brown evenly and don’t stick. Fry until all sides are a deep golden brown, about 5 minutes total.
- Keep an eye on the thermometer and adjust your burner as needed. If the oil gets too hot, the outside will brown before the inside cooks; if it’s too cool, the pie bombs will turn greasy and uneven.
- Lift the fried pie bombs out of the oil with the slotted spoon and transfer them to a plate or tray lined with several layers of paper towels to drain. Repeat with the remaining dough balls.
- In a small bowl, whisk together the powdered sugar, milk, and light corn syrup until the mixture is completely smooth and pourable. It should coat a spoon but still drip easily.
- Dip or gently toss each warm (but not piping hot) pie bomb in the glaze to coat. Let the excess drip off, then place them on parchment paper or a cooling rack. Serve right away or let the glaze set for about 10 minutes before serving.
How to keep the filling inside (and avoid cherry explosions)
The main thing that causes leaks is thin dough or weak seams. When you split the biscuits, keep a bit of thickness in the center so it can support the filling. Don’t stretch the dough like pizza; just press it out gently. When you pinch the edges shut, go all the way around twice—first to close, then again to reinforce. After that, roll the seam underneath so it’s on the bottom of the ball, not on the side. If you see any cherries peeking out, patch that spot with a tiny piece of extra dough before frying. Also, avoid overfilling; a level tablespoon of cherry pie filling is enough for a good ratio without bursting.
Oil temperature details that actually matter for these pie bombs
For this recipe, 325°F isn’t just a suggestion—it’s the sweet spot. At this temperature, the biscuit dough has time to cook through while the outside turns a deep, even golden brown. Start checking your thermometer before the first batch goes in, then keep it in the pot while you fry. When you add dough, the temperature will drop slightly; if it falls below about 315°F, bump the heat up a touch. If you see it creeping toward 340°F or higher, lower the heat and pause before adding more pie bombs. Crowding the pot also drops the temperature and leads to greasy results, so stick to 2–3 at a time. A few extra minutes of attention here equals a much better texture.
No Grands biscuits on hand? Here’s what you can swap in
If you can’t find Grands “Big” biscuits, you still have options. Regular refrigerated biscuits work; just note they’re smaller, so you’ll use slightly less filling per piece and get more, bite-sized bombs. You can also use canned crescent roll dough—pinch the seams together, cut into squares, fill, and seal well. For a more from-scratch feel, a soft, slightly enriched yeast dough (like a basic dinner roll dough) also works, but you’ll need to proof and plan ahead. Whatever you use, the key is a dough that’s soft, pliable, and not overly sweet. Avoid very thin or flaky pastry sheets (like phyllo) for frying; they’re better suited to baking instead.
Fun flavor twists: turning this cherry version into any-fruit pie bombs
Once you’re comfortable with Cherry Pie Bombs, it’s easy to spin them into other versions. Apple pie filling with a pinch of cinnamon in the glaze gives you a mini fritter vibe. Blueberry filling pairs well with a lemon-spiked glaze—add a bit of lemon zest or swap part of the milk for lemon juice. Peach or mixed berry fillings both work great too, as long as they’re not too runny. You can even stir a splash of vanilla or almond extract into the glaze for extra depth. Just remember: if your filling is very chunky, chop the fruit pieces smaller so they fit inside the dough without tearing it.
Curious About This Recipe? Read On
Can I bake these instead of frying?
Yes, you can bake them, but expect a different texture. Baking gives you more of a soft, stuffed roll instead of that doughnut-shop style crust. Place the sealed balls seam-side down on a parchment-lined baking sheet, brush lightly with melted butter, and bake at 375°F until golden, usually 13–18 minutes depending on size. Make sure the tops are nicely browned so the centers are cooked through. Let them cool slightly, then dip in or drizzle with the glaze. They’ll be lighter and a bit less rich than the fried version.
Can I make Cherry Pie Bombs ahead of time?
You can prep parts of the recipe ahead, but timing matters. The dough balls filled with cherry pie filling can be assembled a few hours in advance and kept covered in the fridge. Don’t let them sit more than 6–8 hours or the dough may get soggy at the seams. Fry them just before serving for the best texture. If you need to fully cook ahead, fry and cool them, then store unglazed in an airtight container at room temperature for up to a day. Rewarm briefly in a low oven and glaze right before serving so they feel fresh.
Why is there corn syrup in the glaze, and can I leave it out?
The light corn syrup helps the glaze set with that smooth, shiny finish you see on bakery doughnuts. It also keeps the glaze from becoming too brittle or crusty after it dries. You can leave it out if you prefer; just know the glaze may dry more matte and can crack slightly. If you skip it, adjust the milk slowly so the glaze stays thick enough to coat the pie bombs without running off. A small drizzle of honey or maple syrup can loosely mimic the effect, but the flavor will be more noticeable.
Cherry Pie Bombs

Ingredients
- as needed vegetable oil for frying
- 16.3 ounces Grands Big biscuits flaky
- 21 ounces cherry pie filling
- 2 cups powdered sugar
- 1/4 cup milk
- 1 tablespoon light corn syrup
Instructions
- Pour vegetable oil into a 2- to 3-quart heavy saucepan until it's a little more than halfway full—deep enough to fully submerge the dough balls—and set the pan aside.
- Open the biscuit can and separate each biscuit along the flaky layers. Gently press each piece flat with your fingers or a rolling pin, taking care not to roll the dough too thin.
- Place about 1 tablespoon of cherry pie filling in the center of each flattened dough round.
- Gather the dough edges around the filling, pinching them tightly to seal, then gently roll the sealed piece between your palms to form a smooth ball.
- Heat the oil to 325°F (163°C) and keep it at that temperature while frying.
- Using a slotted spoon, carefully lower 2 to 3 dough balls into the oil at a time. Move them gently so they don't stick and fry until evenly golden on all sides, about 4–6 minutes total.
- Watch the oil temperature and adjust the heat as needed—too hot will burn the exterior before the center cooks, and too cool will lead to uneven frying.
- Lift the finished pie bombs from the oil and place them on a plate lined with paper towels to drain. Continue frying the remaining dough balls in batches.
- Whisk together the powdered sugar, milk, and corn syrup in a small bowl until the glaze is smooth and pourable.
- Dip or toss each warm dough ball in the glaze to coat, lift it out and let excess drip off, then place on parchment paper or a cooling rack to set.
- Serve the glazed cherry pie bombs right away, or let the glaze dry for about 10 minutes before serving.